Skip to main content
Sedona, AZ – Soldier Pass Trail and Cave
Introduction:
What? :
One of my
favorite hikes in Sedona is the Soldier Pass Trail. Somehow longer than the other
trails I did but it cover nice canyon, interesting arch cave structure, pass
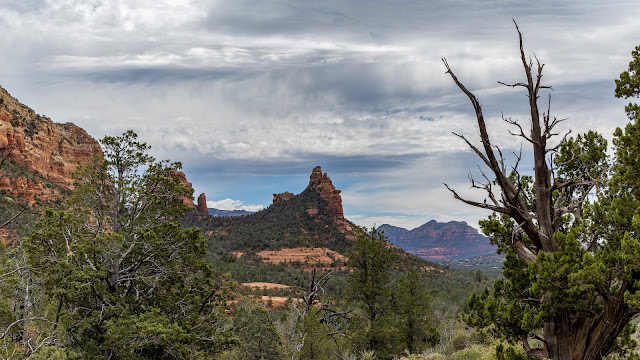
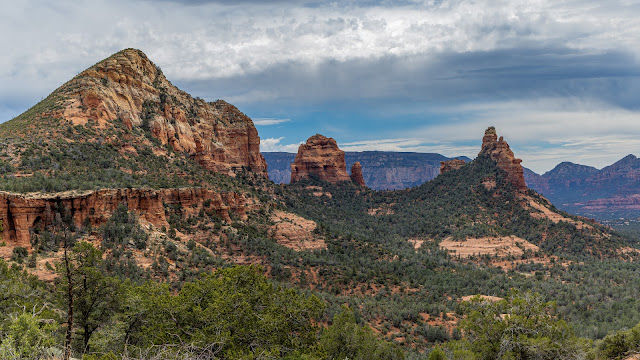
and a lot of view of Sedona mountains.

There are
several attractions as you hike the loop, visit the large a sinkhole named
Devil’s Kitchen, see the small Seven Sacred Pools, hike up the side cliff to Soldier
Pass cave and enjoy the view from the pass and high section of the trail.

Overall, this loop
is about 6.5 mile long with 1,500 ft elevation gain and considered Moderate.
I started my
hike in a far parking lot so for me it was almost 9-mile hike and it took me almost
4 hours to hike it including climbing the cave and the far side of the pass
loop.
Related Sedona Blogs:
Where? :
There are
several different starting points to do this hike, and this also depend on the
exact hike you want to do.
If you want to
hike out and back than the only trailhead you can use is the “official” Soldier
Pass Trailhead.
The problem with
this trailhead that the very small parking lot can be close to cars (As when I
visit here) or already full.

You can’t park anywhere in this private neighborhood
area and there are many signs that your car will be tow away if you will park
there.
If the parking
is full or close the only place you can park is at Posse Grounds Park and Ride
that is located about a mile away from the trail head (on Soldier Pass Road and
Carruth Dr). There is a pedestrian walking path all the way from the far
parking lot to the trailhead. This is adding overall 2 miles to your hike, this
is what I did.
From here there
is a shuttle service that can take you to the trailhead but looks like it was
slow and not so frequent.

If you are
doing the loop hike, going up to Soldier Pass I do recommend to park at Brins
Mesa Trailhead (or Jordan Road Trailhead).
This parking
lot is located about 1 mile east of the “official trailhead” but in order to
drive there you need to drive through the main Sedona Road (highway 89a).
This is relatively
larger parking lot, located on the loop itself and you can start from this
trailhead. Unfortunately to I learn about this parking only during my hike.
Here you need
to pay for parking and have the Red Rock Pass or America the Great card.
The parking lot
is open 24 hours and there are restrooms and a machine to purchase your parking
ticket.

When? :
This is year-round
hike, but the best time is spring and late fall when the weather is the best.
On summer day,
when it can be VERY hot, you must start as early as you can, most of the pass
section of the trail is exposed to sun, come prepared.
At Winter month
it can get cold and rainy and even days that the trail is covered with snow.

Due note 1: Depending on
your hike length bring a lot of water with you, it can be very hot with exposed
to sun hike.
Due note 2: This is a very
popular hike, especially the first section, as you hike up the cave. Less
people doing the pass and in the loop section you will see even less.
I will recommend
starting your hike at the Jim Thompson trailhead. It is much easier to get a
parking space here, it is on the trail itself and the 6-miles loop hike is the
best option. I wish I knew it before I did my hike.
Due note 3: The small Soldier
Pass trailhead is located at the end of Forest Service 9904 Road. This parking
lot is gated, and it is only open from 8 am to 6 pm. When the shuttle is in
service the parking lot is closed.
If you want to
park here you must come early and stand in line before parking gates are open
at 8am, there is no overflow parking along the streets.
Due note 4: If your car is
still in the Soldier Pass Trailhead parking lot at 6.01pm, it is staying there
all night. The gates will be locked.
Due note 5: Sedona Shuttle
Service
When I visit
Sedona (April spring break weekend, 2023) there was a service shuttle that can
take you to the trailhead.
Shuttle
provides transportation to popular trailheads.
The Sedona
Shuttle is the free and it run year-round, Thursday thru Sunday.
When I was in
Sedona, the town was full of other travelers and hikers and I saw many waiting to
the shuttle bus, not sure if it was slow or not so frequent.
There is an app
that shows real-time bas location.
Shuttle
website:

Due note 6: Does not look
like you need Red Rock Pass if you park at the Soldier Pass trailhead parking
lot (it was closed when I was there).
Due note 7: I do not remember
that I saw restrooms at Soldier Pass trailhead.
There are restrooms
where you are taking the shuttle at Posse Grounds Park and Ride.

My thoughts:
I really like
this hike, wanted to do it for several years and now got the opportunity.
At start I thought
to hike only to the cave, then I told myself that I need to see the pass, from
there doing the longer loop back was the only way for me 😊
The pass and
the back side of the trail, although not over dramatic, provide nice view on
the surrounding area.
This loop + the
2 miles walk to my car from the trailhead make it to be almost 9 miles hike with
1,600 ft ascent and descent (I did it in less than 4 hours).

The Hike:
From the trail
head parking look for the hiking trail on the right (east) side near the end of
the parking, the jeep road at the end of the parking is not the hiking trail.

The first hike point
of interest is located only 0.2 mile from the trailhead, cross the creek and
climb the other side.
This large sinkhole
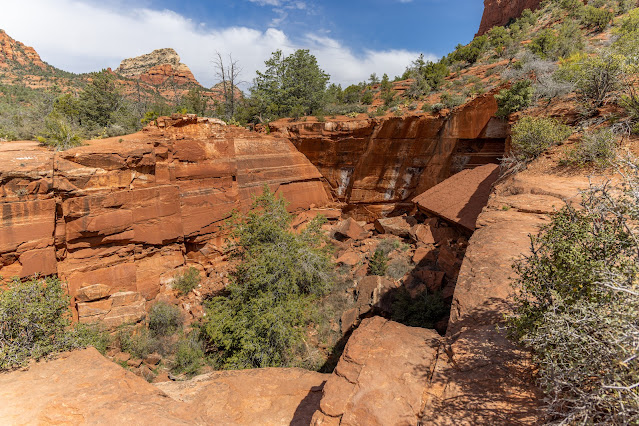
called Devil’s Kitchen; you can see the rocks that collapse from the sidewalls.

Turn left and continue
walking along the mark trail for another 0.4 miles until you get to the Seven
Sacred Pools. Series of small pools in the rock, depending on recent rainfall, they
may be filled with water.

From here you will
keep hiking on the trail.
Keep hiking in
the trail that at some point go down to the creek.
About 1.3 miles
from the trailhead, you will reach a well-marked trail fork. To get to the cave
keep walking straight and out the creek and to Soldier Pass turn here left.
From the trail
junction it is a 0.5-mile walk, one-way to the cave.
From the trail
junction you will start climbing to the right cliff side of the valley.
The trail start
climbing moderately, soon after the junction you will reach large expose rocky
section, look slight left for the trail.

From here the ascend increase, become
steep, and even with rocky sections.
The trail keep
climbing all the way to the base of the cliff. You will not see the cave so
clearly but rather the nearby open arches. Once you are in the cliff base the Soldier
Pass cave is the one on the right.
You will see
the way to climb into the cave on your right.

Here you will
probably see many other hikers, give turns for climbing hikers and the one that
want to get down.

You need to squeeze
in and climb this short section right into the cave.
The cave is not
dark because light get in from the opening below, the small open arch window
and from the remote side.
There is wide rock
ledge to walk on but be careful here, there are many other hikers here so when
you are passing someone try not to fall into the opening …

If you really
want some additional adventure, you can walk and seat inside the small opening
arch or even walk to the far side of the opening and climb up the large rocky boulders
to the plateau above the cave.

I came here
mid-day and there where many other hikes in the cave, but it was impressive and
nice to visit here, worth the steep climb.
After a short
rest I climb down from the cave and explore the nearby arch. From here hike
back to the trail junction in the creek below.
Here I turn to
the right, up the creek and in the direction of Soldier Pass.
As you start to
climb out of the creek the view is opened and just near the top you have the
best view backward. From the trail junction to the pass level, it is about 0.5 mile,
and the climb is not so steep.
Overall to get
to this point including the tunnel section it is 2.4 miles.
From here you
can walk back to the trailhead (about 1.5 mile) or keep hiking a do the loop
hike.
From the pass you
will turn right and soon you will reach the junction with Brins Mesa trail.
Keep hiking
this clear trail that pass in a burned area, so the landscape is open and with
a lot of scrabs and bushes and few trees.
The trail in
this section is almost level up, soon you will see on your right a small Table
Mountain made of white rock. This is off the main trail, but you can find
non-official trails leading to the base of this rock and you can climb it easily.
The view from
this high location is nice, you can see the valley that you hiked through below
you and get a nice view on Brains Bute Mountain.
Keep hiking to
the final pass and enjoy the view before you start descending.
This is about 0.7
mile from the time you connected to this trail.

The from this
point the trail start descending into the large valley below you and after 1.3
mile you will reach Brins Mesa Trailhead parking (or Jordan Road Trailhead).

From here you
need to turn right and take Cibola Pass trail that is climbing up to the low saddle
in front of you.
A short hike up
the pass and you will pass through a gate in the fence and start descending on
the other side of the pass.
After a short
hike you will reach a trail junction, this will be 0.4 mile from the Brins Mesa
parking lot.
Here you will
take the Jordan Trail, and after short hike you will find yourself in Devil’s Kitchen.
From here it is
only a short hike to the trailhead parking.

www:
Additional Pictures:


I am hiking lover but I have no hiking experience with cave. After reading your experience, I am keen to go on your experienced places to enjoy this activity, after enjoying best bus tour of nyc.
ReplyDelete